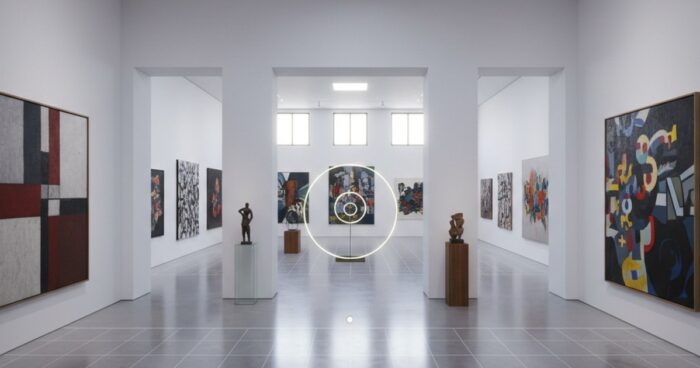
виртуальный тур шоурум мебель — 360space.ru

virtual tour for a showroom: online fitting of interior and furniture

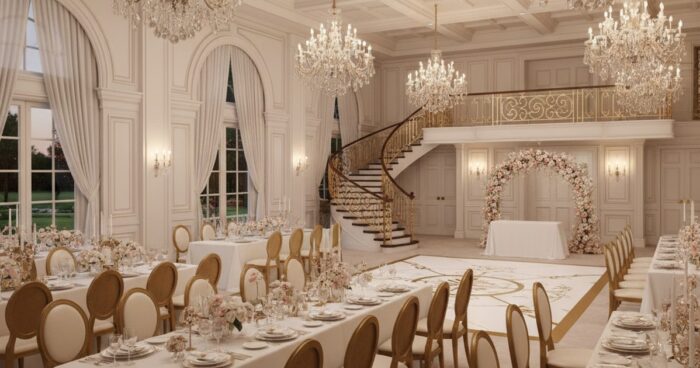
A virtual tour for a furniture showroom changes the logic of sales: the client goes to the website and finds himself inside the room, can go up to the sofa, walk around the kitchen unit, and look at the texture of the upholstery. Previously, you had to go to a shopping center to do this - now a link in the direct message or a QR code in the catalog is enough. We at 360° Space have been renting such spaces since 2019: Italian furniture showrooms, porcelain stoneware showrooms, kitchen exhibitions from 80 to 2000 m². I’ll tell you how it works, what numbers it gives to retail and how much it costs. Briefly: a 3D tour of a showroom is filmed in 1–3 days on Matterport Pro3, the finished tour increases the time on the site by 3–4 times and brings in +20–35% of applications. The cost depends on the area: salon 200 m² - from 35,000 ₽. Why does retail need a 3D tour? In a furniture showroom, a client spends on average 3–5 visits to make a decision. Half of them are “come back to show your wife again,” “come back in a week with measurements,” “take your mother-in-law to look at the color.” A 3D tour covers most of these situations online. Time on the site increases by 3–4 times. The average user spends 4-7 minutes on a tour instead of 50 seconds on a static gallery. For the Italian furniture showroom in Kazan, we received a median of 5:40 - this immediately increased our positions in Yandex. +20–35% to application conversion. A client who has “walked” through the hall online is 2 times more likely to leave a contact - he has already seen the product, he does not need to go blind. Reducing the workload on consultants. Managers receive warm clients who know a specific model and upholstery. One kitchen showroom in the Moscow region refused two sales bids after introducing the tour. The geography is wider than the region. A client from Krasnodar calmly buys a set from a Moscow showroom because he sees it “live.” We had a case - a kitchen for 1.2 million rubles went to Yakutsk on a 3D tour, without a single offline visit. The “open 24/7” effect. Applications arrive at 23:00 and on Sunday morning - when the showroom itself is closed. How it works The process is simple, for the client it takes one working day of shooting. An operator comes to the location with a Matterport Pro3 camera (or Insta360 Pro 2 for large open spaces) and places scanning points every 2–2.5 meters. The camera itself takes full spherical images and measures the geometry of the room with lidar. For a 200 m² salon it takes 3-4 hours of shooting. For a large exhibition hall of 1500 m² - two days, 6 hours each. Next comes post-processing: gluing the point cloud, placing interactive signatures (prices, articles, links to products in the card), embedding a floor plan, dollhouse view and VR mode. After 5–10 working days, the client receives a finished tour. The tour can be built in three ways - we decide this at the discussion stage. First: hosting in the 360° Space cloud - our high-speed servers can withstand the load, there is technical support, you don’t need to configure anything. Second: deployment on the customer’s server - if the client has its own IT department and data storage requirements. Third: an offline version for PC or a separate assembly for a VR headset - this assembly works without the Internet directly from a flash drive. There was a case: a bedroom manufacturer participated in an exhibition at the Expocenter, we were asked to put together a separate build for Oculus Quest 2 - visitors put on a headset and “walked” around the factory and showroom without leaving the stand. After the exhibition, the same assembly remained with the client for presentations to wholesalers in the regions. See all projects → How much does it cost? The price is calculated by area and number of scanning points. Up to 100 m² (small salon, corner in a shopping center) - from 20,000 ₽ 100–300 m² (standard furniture showroom) — 35,000–60,000 ₽ 300–800 m² (large salon, several brands in one room) — 70,000–130,000 ₽ From 800 m² (exhibition complex, megamall) - from 150,000 ₽, we calculate individually. The price already includes filming, processing, placement of product tags (up to 30 pieces), integration into your website and a month of hosting in our cloud. Next, you either extend the cloud, or take the offline version, or we help you deploy the tour on your server. It is more convenient to make an exact calculation in a calculator - it takes into account the height of the ceilings, the presence of glass display cases (this affects the complexity of the shooting) and additional options such as interface branding or multilingualism. Frequently asked questions How long does it take to shoot a 300 m² showroom? One working day: 4-5 hours for scanning plus camera placement. At the same time, the showroom can work as usual - we shoot in zones, visitors do not interfere. Is it possible to add prices and a “buy” button to the tour? Yes, this is the basic option. Each product has an interactive tag with a photo, price, description and a link to a card in your online store. Tags are edited after shooting - if the price or product changes, we update it within an hour. What if the showroom moved or changed its display? We reshoot only the changed areas - it’s cheaper than a full tour. If more than 60% of the area has changed, it is more profitable to remove it again. Calculate costProject catalogMatterport

виртуальный тур Google Карты инструкция — 360space.ru

How to place a virtual tour on Google Maps: a step-by-step guide

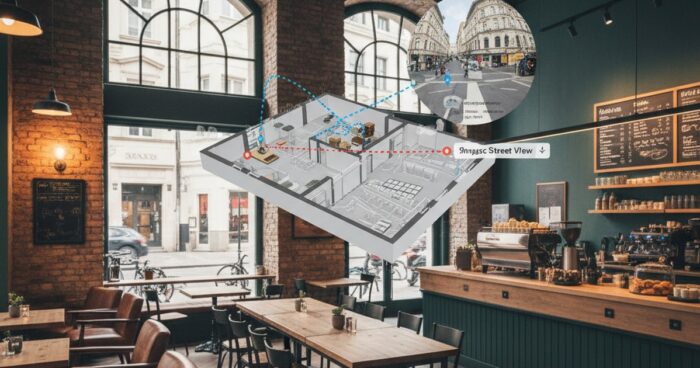
How to Post a Virtual Tour on Google Maps: Step-by-Step Instructions In Brief: Posting a Virtual Tour on Google Maps is an effective way to improve your business's visibility and attract customers. We, the 360° Space team, regularly help our customers integrate tours into their Google My Business profiles, for example, for a chain of coffee shops in Moscow. Integrating a virtual tour into Google Maps is not just a fashionable feature, but a powerful tool for business promotion. If you are the owner of a cafe, store, hotel or any other establishment that wants to be visible on the Internet, these instructions are for you. We'll walk you through step-by-step how to add your 3D tour to your Google My Business profile, based on our experience working with dozens of clients. Step 1: Prepare a Quality Virtual Tour Before you post anything, make sure your virtual tour meets Google standards. This means high-resolution panoramas (minimum 14 megapixels), no artifacts and good lighting. Google is very particular about quality, and understandably so: their goal is to give users the most realistic experience possible. We always recommend using professional equipment and software to avoid problems at this stage. If the tour is made by us, then we have already taken care of all the technical details. If you have a third-party tour, make sure it meets the requirements. Photos should be stitched together without visible seams, and color correction should be natural. Remember that Google may reject low-quality photos. Step 2: Create or access a Google My Business profile Your business must be registered and verified with Google My Business. If you don't have one yet, create one by going through the verification procedure. This may take from several days to several weeks, depending on the confirmation method (usually by mail or telephone). Without a verified profile, you will not be able to manage your information on Maps, including adding a tour. For our clients who already have a profile, we often request access to it in order to upload the tour themselves. This saves time and avoids mistakes. If you plan to do this yourself, make sure you have administrator or profile owner rights. Step 3: Upload panoramas via the Street View app To upload panoramas, Google provides a dedicated Google Street View app (available for iOS and Android). Open it, sign in to your Google account and click the add new photos button. Select the "Import 360-degree photos" option and download all the panoramas of your tour. Important: Panoramas must be in JPEG format with metadata indicating their 360-degree format. Many tour creation programs automatically add this metadata. When downloading, the app may ask you to indicate the location of each panorama on the map. This is critical to properly linking panoramas into a tour. Step 4: Link the panoramas After loading the panoramas, you need to “stitch” or “link” them into a single tour. In the Street View app this is done manually. Select one panorama, then click on it and see arrows that you can move, indicating the direction to the next panorama. This process requires care and precision. We, as specialists, use professional tools that automate this process and ensure smooth transitions. But for independent work, the Street View application is the only official way. Take your time, check each transition so that the user does not get lost in your tour. For example, when shooting a 600 m² restaurant with several halls and passages, correctly linking the panoramas took us some time so that the logic of movement was intuitive. See all projects → Step 5: Wait for moderation and publication After you have uploaded and linked all the panoramas, Google sends them for moderation. This process can take from several hours to several days. At this time, Google specialists check the quality of the images, their compliance with the rules and the correctness of the connections. If everything is in order, your virtual tour will appear in your Google My Business profile and will be available on Google Maps and Street View. If a tour does not appear or receives a “Rejected” status, it is likely that some rules were violated. In this case, you will need to find the reason and repeat the download. Sometimes this may be due to geo-referencing or low-quality images. Once a client from Kazan was faced with the fact that Google rejected a tour because the photos in one of the rooms were too dark, so they had to reshoot. Step 6: Integrate a tour into your website (optional) Although this step does not directly apply to Google Maps, it is very useful. After publishing the tour on Google, you will have the opportunity to embed it on your own website. This is done using HTML code that can be generated directly from Google Maps. Simply find your tour, click Share and select the Embed Map option. This will allow your website visitors to immediately immerse themselves in the atmosphere of your establishment without leaving your page. In addition, we offer flexible formats for hosting tours, which we create: (1) 360° Space cloud - high-speed servers with technical support; (2) customer’s server - the tour is deployed on the client’s own infrastructure; (3) offline - standalone version for PC or a separate assembly for a VR headset, works without the Internet. So, even if you don't want to depend on Google, you always have alternatives. Common mistakes when posting a virtual tour on Google Maps Poor quality panoramas: Blurred, dark or too bright photos will be rejected. Google strives for maximum realism. Incorrect location reference: Panoramas must be accurately positioned on the map, otherwise they will not display or link correctly. Lack of logical connections: If the panoramas are not connected by arrows, the tour will look like a collection of individual photos rather than a single space. Violating Google Policies: Failure to follow content guidelines (such as personal information or obscene images) will result in disapproval. Using outdated content: If your establishment has undergone renovations or major changes, the old tour will be misleading to users. Update content regularly. Frequently asked questions How long will my virtual tour be visible on Google Maps? Once published, your tour remains on Google Maps indefinitely until you or Google remove it. However, we recommend updating the tour if there are significant changes in the interior of your establishment. Can I post a tour not created by 360° Space? Yes, you can post any virtual tour as long as it meets Google's technical requirements (high-quality panoramas in JPEG format with metadata). We can help you with verification and downloading if necessary. What should I do if my tour is rejected? Google usually provides a reason for the rejection. Read the message carefully, correct any identified deficiencies (for example, replace low-quality panoramas or double-check connections) and repeat the download procedure. If this doesn’t work, contact 360° specialists...

3д тур отель бронирования — 360space.ru

3D virtual tour for a hotel: how to increase direct bookings without OTA commission

If you manage a hotel and want to reduce the share of the OTA commission, 3D tour hotel booking is a working tool: it removes the guest’s “blind spot” when choosing a room and transfers traffic from aggregators to your website. In the guide, we’ll go through step by step how to prepare a shoot, integrate a tour into a funnel and link it to a booking form. The material is useful for owners, marketers and managers - especially those who pay Booking, Ostrovok or Yandex.Travel 15-25% from each night. Briefly: a 3D tour increases the share of direct bookings by removing uncertainty before payment. On our projects, the conversion to an application through the website grows by an average of 1.5–2 times in the first three months after the tour is installed. Step 1. Make a list of interiors for shooting. You don’t need to shoot the entire hotel. At the start, there is enough: a lobby, a restaurant and a breakfast area, a SPA or a swimming pool (if available), and one reference room of each category. A hotel in Sochi with 40 rooms cost us six filming points - this was enough to cover 85% of guest requests. Categories cannot be mixed. If you have “Standard”, “Junior Suite” and “Lux”, we rent three different rooms. Otherwise, the guest will see “Standard” on the website, and “Lux” on the tour, and trust will be lost. Step 2. Embed the tour on the main page and in room cards The main mistake is to hide the tour in the “About Us” section. A guest who comes from an advertisement will not reach him. The tour should be on the first home screen and always inside the card of a specific room, next to the “Book” button. In the “Suite with Sea View” card, only a tour of this very suite is appropriate. A boutique hotel in Kazan did this: each room card has its own mini-tour, and the share of direct bookings after two months increased from 12% to 28%. Step 3. Connect the tour with the booking form The tour itself is a viewing. To get a reservation, you need dots inside the tour with a “Book this room” button. The guest clicks on the bed or the view from the window - a form opens with a pre-selected category and dates. This closes the classic scenario: “I looked - became interested - lost motivation while looking for a button.” We make connections through TravelLine, Bnovo, Bitrix24 and direct webhooks - the choice depends on your PMS. Step 4. Connect analytics and UTM tags Without measuring the effect, you will not prove to the owner that the tour works. Minimum: event “opened a tour”, “spent more than 30 seconds in a tour”, “clicked a reservation from a tour”. We create goals in Yandex.Metrica and pass source=tour to the reservation form. A month later, a client in Kaliningrad showed us the unloading: with an average site conversion of 1.8%, visitors who completed the tour booked in 6.4% of cases. Here's the argument for next season's marketing budget. Step 5. Use the tour in email and messengers The tour is not only about the website. It is convenient to insert a link to a specific point (for example, the view from the window of room 305) in WhatsApp correspondence of the reservation department, in letters after a request, in social network posts. The manager does not describe the room in words - he sends a link, the guest views the panorama himself. It sounds like a small thing, but this is what shortens the “question → answer → solution” chain from three days to half an hour. Step 6. Select tour placement format We have three working scenarios. Cloud 360° Space - high-speed servers with technical support, suitable for most hotels. Customer server - when the network has a strict security policy and the tour must live within its own domain. Offline version - for exhibitions and presentations without the Internet: a country complex in the Moscow region asked for such an assembly for a stand at MITT, the tour ran on a laptop without a network for two days. For the VR headset we are putting together a separate assembly - the “come to the sales office and try on the number” format. View all projects → Typical mistakes when launching a tour for a hotel One tour for the entire hotel. Without division into room categories, the guest gets lost and does not understand what exactly he is booking. Tour only on a separate page. If it is not in the number card next to the booking button, the effect on conversion is minimal. Shooting in daylight from the window. Morning and evening light give different moods. You need to shoot with the full lighting scenario turned on - this is how the room looks like in the best photos. No analytics. In six months, no one will remember what happened BEFORE and will not be able to calculate the ROI of the project. Frequently asked questions How much does a 3D tour cost for a hotel with 30–50 rooms? Basic photography of the lobby and 4–5 reference rooms - from 60,000 ₽. If you need all the rooms individually, a spa, a restaurant and integration with PMS - usually 180,000–350,000 rubles. We calculate the exact estimate according to the hotel plan using the calculator on the website. How does a tour affect OTA commissions? Directly - no way, OTAs do not prohibit the availability of the tour. Indirectly - a guest who sees a detailed 3D tour on your website more often returns to book directly, bypassing Booking or Ostrovok. In our cases, the share of direct bookings is growing by 10–20 percentage points. per quarter. Is it possible to embed a tour on a website using Bitrix or Tilda? Yes, the tour is embedded via an iframe in one line. Works on Bitrix, Tilda, WordPress, Modx, and on its own engines. Additionally, we connect booking points inside the tour - they open your PMS form with the specified parameters. Calculate costProject catalogMatterport

виртуальный тур ресторан Google — 360space.ru

Virtual tour for a restaurant: how to get more bookings through Google Maps

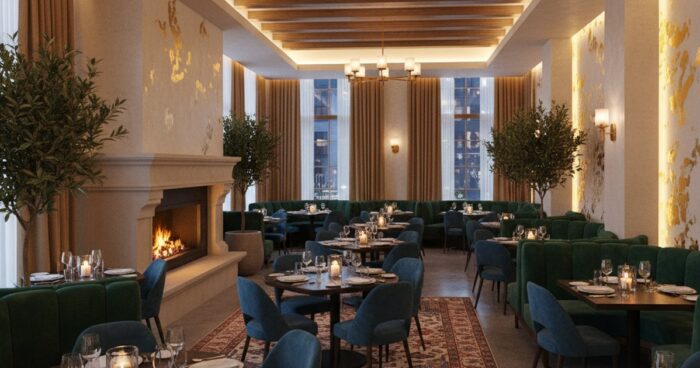
Briefly: How a virtual tour for a restaurant on Google Maps helped the Moscow establishment “Gastronomica” increase the number of bookings. We digitized a 250 m² space in one day, integrated the tour into Google Business Profile, and within a month the client reported a noticeable increase in applications. Virtual Restaurant Tour: How to Get More Bookings Through Google Maps At 360° Space, we often see restaurateurs looking for new ways to attract guests. And a restaurant virtual tour, hosted directly on Google Maps, has proven to be one of the most effective tools. Using the example of our client, the Moscow restaurant “Gastronomica”, we will tell you how it works. Task: to attract new guests and increase bookings The owners of Gastronomica were faced with a classic problem: good cuisine, a pleasant interior, but an insufficient flow of new visitors. The main channel of attraction was Google Maps, where the restaurant had good reviews, but the photos did not give a complete picture of the space. Standard photo galleries, even professional ones, do not convey the atmosphere and do not allow one to evaluate the arrangement of tables, zoning, or the view from the window. The client wanted potential guests to be able to “walk” around the establishment before their visit and feel its atmosphere. This is especially true for restaurants that are often booked for events or simply for dining in a specific setting. Regular photographs, even in 360°, did not provide interactivity and freedom of movement, which was critical for conveying a sense of spaciousness and comfort. What we did: digitization and integration Our 360° Space team went to the site. The Gastronomics restaurant occupies an area of ​​about 250 m² with several halls and a summer veranda. For filming we used professional equipment Matterport Pro2. This allows you to get detailed panoramas and an accurate 3D model of the room. The process took one shooting day. We scanned all key areas: the main hall, banquet area, bar counter, separate tables by the window and, of course, the summer terrace. In total, about 150 scans were made, from which a single virtual tour was then stitched together. It was important to take into account lighting and furniture arrangement to make the tour look as attractive and realistic as possible. After post-processing, which took 3 days, we provided the client with a finished tour. It included: A complete interactive virtual tour of the entire restaurant. Integration into Google Business Profile so that the tour is available directly from the map. Possibility of embedding on a restaurant website and publishing on social networks. Ready-made 360° panoramas of individual areas for advertising campaigns. We also advised the client on the best ways to use the tour in marketing, such as how to add it to mailings or booking widgets. The flexibility of tour accommodation formats is one of our strengths. We can host the tour on our high-speed 360° Space servers with technical support, deploy it on the customer’s server, or even make an offline version for demonstration, for example, on a tablet for event managers. The result: an increase in bookings and engagement Just a month after launching a virtual tour for a restaurant on Google Maps, Gastronomica noticed a noticeable increase. The number of calls and bookings received directly through Google Maps increased by 25%. These are not just clicks, these are targeted actions from people who have already “visited” the restaurant and decided to visit. We also tracked statistics for the tour itself. On average, each user spent about 2 minutes on the tour exploring different areas. This indicates high engagement. In addition, clients began to comment more often that the tour helped them choose Gastronomica for an important event, because they were able to evaluate the privacy and atmosphere of the banquet hall in advance. These are real reviews we received from our client. Once, our client from Kazan, who also ordered a tour for his restaurant, said that after the tour was published, groups of tourists began to come to them, who “planned” their route around the city in advance, including a visit to the restaurant, precisely because of the opportunity to virtually walk around the establishment. See all projects → Want a similar project? If you are the owner of a restaurant, cafe or bar and are looking for an effective way to attract more guests, a virtual tour is what you need. We at 360° Space are ready to help you digitize your space and integrate it into Google Maps and other platforms. This is an investment that quickly pays off, because potential customers get the opportunity to fall in love with your establishment even before their first visit. Frequently asked questions How long does it take to create a virtual tour for a restaurant? Filming a restaurant with an area of ​​up to 300 m² usually takes 1 working day. Post-processing and creation of the tour takes from 3 to 5 working days, depending on the complexity and number of additional options. Is it necessary to close the restaurant during filming? In most cases no. We try to film during minimum busy hours or before opening/after closing, so as not to interfere with the work of the establishment and not to include visitors in the frame. Our process is as unobtrusive as possible. Where can I integrate a virtual tour? The virtual tour can be integrated directly into your Google Business Profile (Google Maps), your website, or social networks. We can also provide a standalone version for PC or VR headset that works without an Internet connection, which is convenient for exhibitions or presentations. Calculate costProject catalogMatterport

архивация строительства 3д — 360space.ru

Archiving construction stages in 3D: legal protection for the developer

Archiving construction stages in 3D: legal protection for the developer In short: Archiving construction in 3D using virtual tours allows you to record each stage of work, creating an indisputable evidence base. This is an indispensable tool for developers, helping to avoid controversial situations and litigation. For example, for one of our clients in Kazan, such recording helped resolve claims from the contractor regarding the volume of hidden work. Archiving of construction in 3D is not just a pretty picture, but a powerful tool for the developer, which provides legal protection and transparency at all stages of the project. We at 360° Space have been working with developers for many years, and we know how important it is to have irrefutable evidence of the work performed and the current condition of the property. A virtual tour allows you to capture the smallest details, which can later play a decisive role. Imagine being able to return to any point on the construction site at any time. This is exactly what 3D archiving provides. We create accurate digital twins of objects, accessible at any time from anywhere in the world. Why does construction need a 3D tour? The introduction of 3D tours at a construction site brings a number of tangible benefits to the developer that go far beyond the scope of a regular presentation: Legal protection against claims. This is perhaps the most important point. The 3D tour records each stage of work, the state of hidden communications, and the quality of installation. In case of disputes with contractors, suppliers or even shareholders (for example, over the quality of finishing), you will have indisputable evidence. We have encountered situations where 3D fixation allowed the developer to save up to 15% of the cost of controversial work, preventing unreasonable payments. Control of remote objects and reduction of travel costs. If you have several objects in different regions, like our client from Krasnodar, 3D tours become an indispensable tool for remote control. The project manager or investor can “walk” through the construction site, assess progress, and identify problems without the need for personal presence. This saves up to 30% of time and money on business trips. Optimizing interaction with investors and partners. Investors always want to see where their money is going. Regular 3D reports show process transparency and construction progress. This increases trust and strengthens partnerships. We have seen projects receive additional funding thanks to such transparent reporting. Personnel training and safety briefing. New employees can study the facility in virtual space before entering the site, which reduces adaptation time. Virtual walks through hazardous areas can be part of safety training, reducing risks by 20-25%. Effective resolution of conflict situations. When identifying defects or discrepancies with the project, a 3D tour allows you to accurately determine the location and nature of the problem, as well as who is responsible for its occurrence. This speeds up the decision-making process and minimizes downtime, saving up to 10% of working time. These benefits make 3D archiving not an expense, but an investment that pays for itself many times over. How it works The process of creating a 3D tour for archiving construction stages is quite streamlined and effective: 1. Planning and approval. We begin with a detailed discussion of your objectives and construction schedule. We determine the key stages that need to be recorded and the frequency of filming (for example, once a month, after completion of certain types of work, or upon request). This can be fixing the foundation, hidden communications, frame, rough and fine finishing. For a large project of 20,000 m², we can plan up to 10 fixation points to cover all critical stages. 2. The filming process. Our specialists go to the site with professional equipment - these are 3D cameras, for example, Matterport Pro3 or Insta360 Pro2, which allow you to quickly and accurately scan the space. Shooting one floor of average area (about 1500 m²) takes from 4 to 8 hours, depending on the complexity and number of obstacles. We take dozens and sometimes hundreds of panoramic photographs, which are then “stitched” into a single whole. 3. Processing and creation of a 3D model. After shooting, the data is loaded into specialized software. Here we stitch together panoramas, build a 3D model (point clouds and meshes), and add interactive points of interest (for example, photos of problem areas, comments, links to documentation). This stage takes from 1 to 3 business days, depending on the volume of data. 4. Delivery and accommodation of the tour. We offer several options for placing a finished 3D tour. The most common is our 360° Space cloud, which provides high-speed content delivery and technical support. Also, the tour can be deployed on the customer’s server, which gives complete control over the data. For situations where there is no Internet access (for example, at roadshows or in demo offices), we can prepare a standalone version for PC or a separate assembly for a VR headset. The flexibility of placement formats allows you to choose the optimal solution for any task. 5. Access and use. The finished 3D tour is available here; it can be embedded on your website, sent to partners, or used in closed project management systems. In it you can measure distances, add notes, and compare the states of an object at different stages. It is a living, interactive document that is constantly updated. See all projects → How much does it cost? The cost of 3D construction archiving depends on several factors: the total area of ​​the site, the number of fixation stages, the selected equipment (Matterport Pro2 for interior spaces or Pro3 for large open spaces) and additional options (for example, integration with BIM models, creation of floor plans). Typically, the price for one shooting session starts from 15,000 rubles for small objects (up to 500 m²) and can reach 100,000 rubles or more for large industrial complexes or residential areas where several days of work are required. For example, to fix one stage of construction of a residential building with an area of ​​5000 m², the cost can be about 50,000 - 70,000 rubles, including processing and placement. We always approach each project individually and are ready to offer the optimal solution to suit your budget and objectives. To accurately estimate the cost of your project, use our online calculator or contact us for a consultation. Frequently asked questions Q: How often should I shoot for archiving? A: The frequency of filming depends on the speed of construction and the criticality of the stages. This usually happens once a month or upon completion of key work (for example, pouring a foundation, erecting a frame, installing utility systems). We will help you create the optimal schedule for your facility. Q: Is it possible to integrate 3D tours with BIM models? A: Yes, it's possible! We can not only create 3D tours, but also export data into formats compatible with BIM systems, which allows you to compare design documentation with the actual state of the object. This significantly improves inspection accuracy and simplifies the detection of deviations. Q: How long is 3D tour data stored? A: When hosted on our 360° Space cloud, the data is stored on our servers indefinitely as long as you are our client. If you choose to host on your own server, the retention period is entirely determined by your infrastructure. We can also provide an offline version of the tour, which you can store on your media. Calculate...

приёмка объекта 3д тур — 360space.ru

How a 3D virtual tour helps in accepting an object from a contractor

Briefly: Acceptance of an object 3D tour allows you to record every centimeter of construction before signing the acts, measure the premises remotely and prove deficiencies to the contractor. At a site in the Moscow region, such a tour saved the customer from overpaying 380 thousand for work that was not completed. Object acceptance 3D tour is a tool for the customer, technical supervision foreman and investor who receive the object from the contractor and want to record its real condition. The guide will be useful for those who are building a cottage, taking over an office for decoration, supervising the renovation of an apartment, or managing an industrial facility. Below are six steps that we have worked on dozens of construction sites, and a list of common mistakes during acceptance. Step 1. Remove the tour before the hidden work is closed. The main pain of acceptance is the hidden work. The screed is poured, the tiles are laid, the drywall is closed - and it is no longer possible to prove that there is no insulation underneath or that the wiring was not laid according to the design. A 3D tour solves it this way: filming is carried out in stages, before the next layer is covered with finishing. At least three control points: after rough installation of engineering (electrical, plumbing, ventilation), after screed and rough plaster, after finishing. At a 420 m² country house site in New Riga, we did five tours - the customer then checked every socket and pipe with the project, without leaving his work in Moscow. Step 2. Agree on fixation with the contractor Contractors are sometimes nervous when they learn about 3D filming. Therefore, it is better to write down the details in the contract in advance: the date of each tour, who pays, whose measurements are considered final. If this is not the case, add an additional agreement before the start of the stage. The very fact that the object will be captured by the Matterport scanner usually disciplines the team. At a construction site in Kazan, after the first round, the foreman himself asked for access to the link - in order to control his workers and not receive surprises at the reception. Step 3. Conduct the shoot correctly To make the tour suitable for acceptance, and not for a beautiful portfolio, three things are important. The first is the density of scanning points: at least every 2 meters, otherwise there will be blind spots. Secondly, filming of all technical niches: panel room, boiler room, attic, basement, shafts. Third, fixing the date and time with scan metadata. A measurement tour (Matterport Pro2 or Pro3) gives an accuracy of up to 1%. This means that on a wall 6 meters long the error is no more than 6 cm - enough for acceptance to catch any discrepancy with the project. Step 4. Check the tour with the design documentation Open the tour in the browser, next to it is the floor plan in PDF. Using the measurement tool, go through the rooms: the length of the walls, the height of the ceiling, the location of windows, the width of doorways. It’s immediately obvious where the contractor strayed from the project. One customer from Yekaterinburg found on the tour that the flight of stairs was assembled with a width of 84 cm instead of the designed 90. If this had been revealed after finishing, the alteration would have cost about half a million. At the rough installation stage, they disassembled and reassembled in a week. See all projects → Step 5. Make a list of comments with coordinates In the tour, each point has an address - coordinates inside the 3D model. This allows you to indicate in the defect report not “there is a crack in the bathroom”, but “bathroom on the 2nd floor, north wall near the box, scan No. 14.” The contractor will not be able to say “they didn’t find it” or “it was wrong.” We usually give the customer a link with the ability to leave marks directly on the tour - each note is highlighted and linked to a location. At an industrial facility of 1800 m², this format reduced the time to approve a defect from two weeks to three days. Step 6. Save the tour as evidence The tour after acceptance is legally significant evidence of the condition of the object on a specific date. If after six months a defect appears that the contractor refuses to recognize as covered by warranty, the tour will show whether this was already the case at the time of delivery. We have three storage options: 360° Space cloud with technical support and backup, deployment on the customer’s server (if this is a sensitive facility and the data should not go outside) or offline assembly - a standalone version on a flash drive for a PC or a separate assembly for a VR headset, works without the Internet. For acceptance they often use the cloud, for industrial facilities with NDA - the customer’s server, for archives in a safe - offline. Typical mistakes when accepting through a 3D tour One tour at the end. They only film the finished object and lose the opportunity to record hidden work. A minimum of three rounds of stages is required. Shooting with a phone or action camera. The result is a panorama without measurements and without reference to the plan. For reception, you need a scanner with lidar or structured light. No date in metadata. The contractor will say “this was removed after we handed over the object, the defect is yours.” The date and time of fixation should be in the tour itself, and not in the file name. The technical premises have not been removed. The boiler room, control room, inspection hatches often remain behind the scenes - and this is where the main jambs are later found. Remove everything, including the attic and crawl space. Frequently asked questions Will the court accept a 3D tour as evidence? Yes, if done correctly. The tour must be made by a certified scanner with the date recorded in the metadata, and the fact of filming must be recorded in an act with the signatures of the parties. We arrange such a package upon request. How much does a tour cost to accept a 500 m² object? Depends on the number of shooting stages and scanning density. One tour of 500 m² with measurements - from 35 thousand rubles, a complex of three surveys in stages - from 90 thousand. Accurate calculation of the object using a calculator. Is it possible to shoot without a contractor present? You can if you have access to the site. But we recommend inviting a representative of the contractor to the shooting and recording this in the act - then he will not be able to later dispute that the tour was done “at the wrong site” or “after our work.” Calculate costProject catalogMatterport

строительный контроль онлайн 3д — 360space.ru

Online construction control: a new standard for developers

Online construction control: a new standard for developers In short: 3D tours replace on-site visits by foremen and technical supervision with a digital model of the object accurate to the centimeter. One day of filming a floor reduces the number of controversial issues between the contractor and the customer by 60% and records hidden work in the form of an evidence base. Online 3D construction control is a format for remote supervision in which each stage of construction is recorded in the form of a walkable digital twin of the object. The developer, technical supervision, investor and designer go into the browser and see the site as if they were there in person - with the ability to measure distances, compare stages and rewind the work history. According to developers who have switched to regular 3D recording, the average time for approval of hidden work reports is reduced from 7–10 days to 1–2. The technology is especially in demand at sites over 5,000 m² and for remote management of a portfolio of construction projects in different regions. Why does a construction site need a 3D tour? Digital recording of an object solves several typical problems of a developer at once - from disputes with a contractor to claims from buyers of finished housing. Specific benefits: Save 40% time on detours. The chief project engineer, who oversees 4–6 sites, spends up to 25 hours a week on the road. A 3D tour replaces 70% of visits: checking the geometry of walls, engineering systems and quality of finishing is available from the office. Evidence base for hidden work. Each shooting point receives coordinates and a time stamp. In case of disputes with a general contractor or subcontractor, the tour works as a notarized record - you can see what and when was done before the screed, plaster or suspended ceiling was closed. Reduction of the acceptance cycle by 30–50%. Shareholders and commercial tenants receive access to a tour of the finished space prior to a personal visit. Controversial issues are identified in advance, and a face-to-face examination takes 20 minutes instead of an hour. Sales acceleration by 15–20%. A tour of a facility under construction, updated once a month, increases buyer confidence: they see real progress, and not renderings from a prospectus. Quality control of finishing before signing KS-2. Matterport scanning accuracy is up to 1% in linear dimensions. This is enough to challenge the volumes with the contractor without repeated measurements with a tape measure. How does this work? The process is divided into three stages: filming, processing, delivery of the tour to the customer. An operator with a Matterport Pro3 camera or similar certified equipment goes to the site. The shooting points are placed in increments of 2–3 meters—for a typical floor with an area of ​​1,000 m², this is about 80–100 scans and 4–5 hours of work. The camera simultaneously takes 360° panoramas and collects a cloud of points using lidar: the output is a geometrically accurate 3D model, and not just a stitching of photographs. Processing and assembly of the tour takes from 24 to 72 hours depending on the size of the object. The finished tour includes Dollhouse mode (a general view of the building with a section of floors), floor plans with automatic dimensions and a tool for measuring distances directly in the browser. You can place comment marks on the site with reference to the contractor’s tasks - each comment has exact coordinates in space. 360° Space offers three options for storing and delivering a tour: hosting on the company’s cloud platform with high-speed servers and technical support, deploying the tour on the customer’s own infrastructure (for developers with information security requirements) or offline assembly - a standalone version for PC and a separate build for a VR headset that works without the Internet in closed security facilities. The regularity of filming is selected according to the stages of work: usually developers fix the object before closing each layer - after the monolith, before plastering, before installing floors, at the end of finishing. For active construction, once every 2–4 weeks is optimal. View all projects → How much does online 3D construction inspection cost? The cost of shooting is calculated based on the area of ​​the object and the complexity of access. Approximate range for the market and tariffs of 360° Space: Up to 500 m² - from 25,000 ₽ per departure, ready tour in 1-2 days. 500–2,000 m² — 50–120 thousand rubles, optimal format for commercial properties and townhouses. 2,000–10,000 m² — 120–400 thousand rubles, typical cost of a floor of a residential complex or production workshop. From 10,000 m² - individual calculation; for a regular series of shootings there is a 15–25% discount. Additionally, you pay for the placement of the tour (or a one-time deployment on the customer’s server) and integration with the developer’s CRM or BIM system, if required. It is more convenient to calculate the exact estimate for a specific object in a calculator indicating the area, number of floors and the desired frequency of repeated surveys. Frequently asked questions Can a tour be used as evidence in arbitration? Yes. The tour records the geometry and condition of the object with reference to the time of shooting. When drawing up an acceptance or examination certificate, the 3D model is accepted as visual evidence along with photographic recordings and measurement protocols. How accurate are the measurements within the tour? The accuracy of Matterport Pro3 and comparable cameras is about 1% in linear dimensions at a distance of up to 10 meters. This is enough to check the final dimensions of premises, openings and calculate the volume of work in disputes with the contractor. How often should a subject be re-shot? For active construction - once every 2-4 weeks and always before closing hidden work. For a finished property at the sales stage, one survey with updating during redevelopment or repair is enough. Is the tour only available online or can it be used without internet? 360° Space provides tours in three formats: in the company’s cloud, on the customer’s server, and as an offline build for a PC or VR headset. The offline version is in demand at sensitive facilities and in field conditions without a stable connection. Calculate costProject catalogMatterport

виртуальный тур строящийся ЖК — 360space.ru

Virtual tour of a residential complex under construction: how to increase buyer trust

Briefly: A virtual tour of a residential complex under construction shortens the path from showing to transaction by 30–40% and removes the buyer’s fear of “buying a pig in a poke.” The guide contains 6 steps to launch a tour, typical mistakes of developers and three hosting options from 360° Space. A virtual tour of a residential complex under construction is a sales tool that solves the main pain of the buyer of a new building: the inability to touch an apartment that does not yet exist. The guide is useful for developers, sales marketers and real estate agencies. You will learn at what point during construction to start filming, how to assemble a tour from real premises and BIM models, what interactive elements increase the conversion of an application, and how to avoid mistakes that turn a tour into an expensive toy with no effect on revenue. Why does a developer need a virtual tour before handing over a house? According to NAR, 54% of home buyers pass on properties without online showings. In the segment of new buildings, the figure is higher: people are not ready to pay an advance for a “render with a balcony in the clouds.” The virtual tour solves three objections at once: it shows real views from the windows on the floors, allows you to walk through a typical layout on a 1:1 scale, and confirms that construction is really going according to schedule. The sales department receives universal material for remote showings: the link is sent to the messenger, embedded in a card on CIAN and Avito, displayed on a tablet in the showroom. One tour replaces dozens of site visits and works 24/7 - especially valuable for regional and foreign buyers. Step 1. How to choose the moment to shoot on a construction site? The optimal windows are three. First: the foundation pit and the beginning of installation to show the scale and dynamics in marketing materials. Second: the monolith is ready, the windows are installed, the views from the apartments are already real - this is the best moment for the “view from the window by floor” tour. Third: pre-finishing, when the layout in the final geometry without furniture is visible. Take off in a helmet and vest, coordinate access with the foreman 2-3 days in advance, choose a dry day without precipitation - moisture on 360° equipment is critical. One day of shooting covers 1–2 floors, depending on the area and number of typical apartments. Step 2. What equipment and technology is suitable for LCD? For standard apartments and apartment buildings we use the Matterport Pro3 camera - it gives the exact geometry of the room, measurements with an error of up to 1%, a dollhouse view and a floor plan automatically. For viewpoints (balconies, roof, landscaping), we add shooting with a high-resolution 360° camera with HDR bracketing so that the window does not “blow out” into white. If the floor has not yet been completed, but a display is needed, we assemble a hybrid: real premises below + 3D model of the upper floors from BIM. 360° Space is able to stitch both formats into one walkable tour without a visual connection. Step 3. How to process the tour and add interactivity? Raw scans are half the job. The conversion is provided by an interactive layer: pop-up labels with the area and price of the apartment, a “rough / white box / with finishing” switch, a “book this layout” button with a transition to CRM, an insolation scheme by the hour, the location of sockets and risers. A good practice is to add an audio guide from the architect for 30–40 seconds for the entrance group and viewpoints. Branding is required: the residential complex logo in the corner, the developer’s colors in the UI, the tour domain on a subdomain of the main site - for SEO and trust. Step 4. Where to place the tour so that it works for sales? 360° Space gives you three options for storage and delivery. The first is the 360° Space cloud: high-speed servers with technical support, the tour opens in 2-3 seconds on any device, we monitor uptime. The second is the customer’s server: the tour is deployed on the developer’s own infrastructure, which is important for large developers with information security requirements. The third is offline: a standalone version for a PC in the sales department or a separate assembly for a VR headset for the showroom, works without the Internet. Placement points: residential complex card on the developer’s website, a separate landing page with UTM for advertising, cards on CIAN/Domklik/Avito, QR code on a banner at the construction site, presentation in the project’s Telegram channel. Step 5. How to integrate a tour with CRM and analytics? A tour without analytics is a blind spot. We connect Yandex.Metrica and GA4 with events: opening a tour, moving between floors, clicking on a specific apartment, clicking “book”. Through a webhook, the request from the tour falls directly into amoCRM or Bitrix24, indicating which layout the client looked at and how much time he spent on the tour. This gives the sales department a ready-made script for the first call. According to our data, the average time on a residential complex tour is 4–7 minutes, the conversion to an application from a warmed-up page is 3–5%, which is 2–3 times higher than that of a static gallery of renders. Step 6. How to update the tour as the house grows? Construction takes 18-36 months - the tour must grow with it. Update plan: reshooting key points once a quarter, adding new floors as they are ready, replacing BIM sections with real scans, updating window views by season. The buyer sees progress and is convinced that the developer is not hiding the construction - this removes the fear of “long-term construction.” The final update is after commissioning: a tour of the finished apartment with finishing becomes material for the secondary market and the developer’s portfolio in the following projects. Examples of implemented tours of new buildings and construction sites: View all projects → What mistakes most often kill the effect of the tour? Rent only a finished show apartment. The buyer needs views from his floor and real construction progress, and not just one licked two-room apartment on the 5th floor. Hide the tour in the basement of the site. The “Virtual Tour” button should be on the first screen of the residential complex card and in each layout, and not in the “About the company” section. Do not update the tour for six months. The buyer sees winter in August and loses confidence - the construction seems frozen. Make a tour without CTA and analytics. Without a “book” button and an event counter, you won’t understand which layouts are really appealing, and you’ll waste your budget on a beautiful picture without sales. Frequently asked questions How much does a virtual tour of a residential complex under construction cost? The cost depends on the area, number of floors and standard apartments, the presence of a BIM model and interactive elements. We will calculate the exact estimate for your property using the 360° Space calculator in 2 minutes. At what stage of construction is it better to book a tour? Ideally, after installing the windows and facade: the real views and geometry of the apartments are visible. For marketing at the start of sales, you can start earlier - with a BIM model + survey of the pit, then update with real scans. Is it possible to embed a tour into a card on CIAN or Domklik? Yes. 360° Space provides a direct link and iframe code that is accepted by all major real estate platforms, as well as social networks and instant messengers. What will happen to the tour after the house is delivered? The tour remains a working tool: you choose one of three hosting formats - 360° Space cloud with support, deployment on your own server or...